Moda Blockheads 4, Block 4
Welcome to Bunny Hill, everyone! It’s time for Block 4, brought to you today by me, Anne Sutton of Bunny Hill.
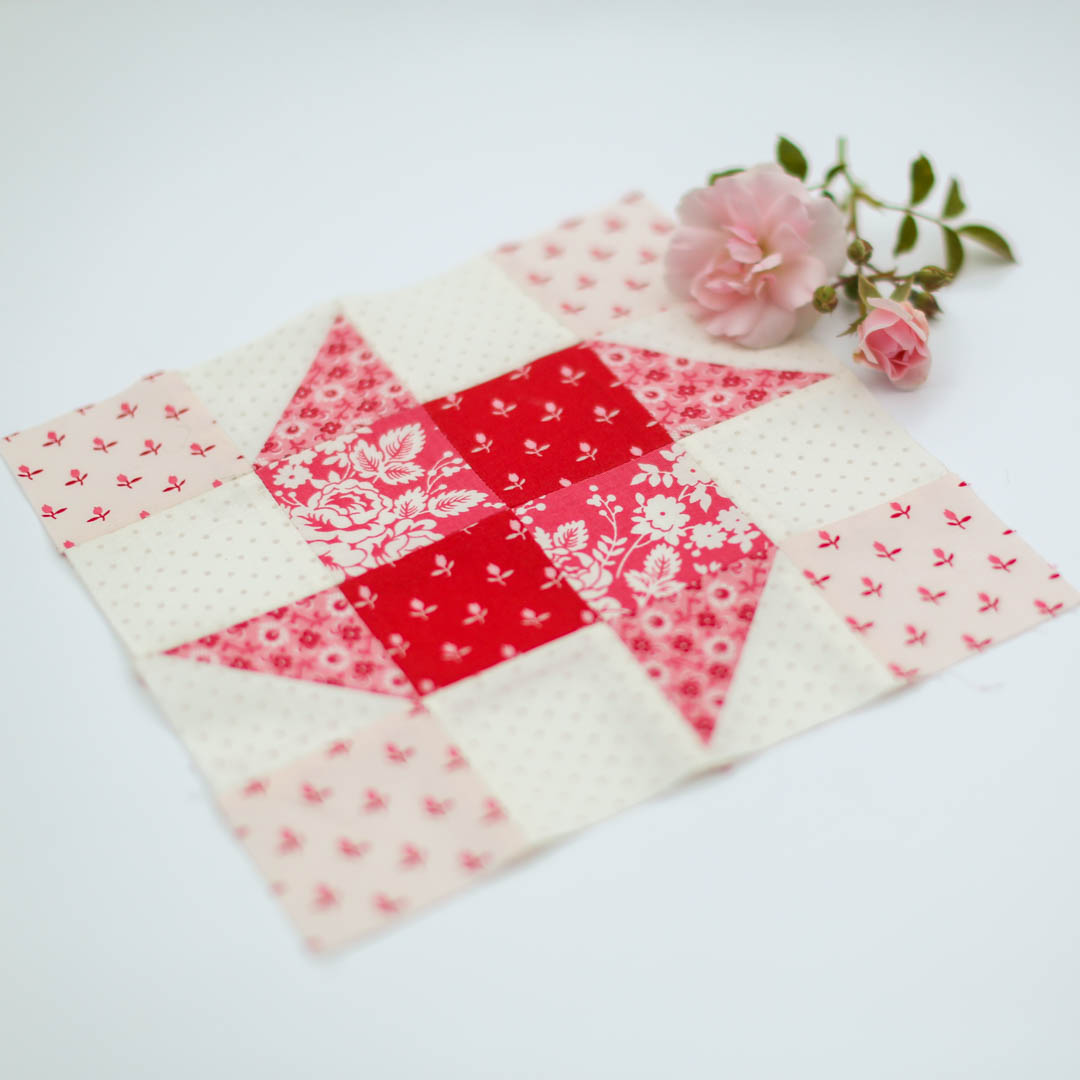
My block is simple, so I’ve given it a simple name…say hello to Spinner! Spinner is an easy block to make, but don’t be deceived by its simplicity. It can have different looks depending on fabric placement! I hope you have fun playing around with this one. I sure did!
I know you are anxiously awaiting Blockheads 4, Block 4, so here you go!
Spinner Block 4
And here's the link to the Spinner pattern on Moda's blog: Moda's BLog, Spinner, Block 4
If you have a special piece of fabric that you’ve been saving, try it in the center square of this block. I’m using my new fabric line called The Flower Farm, and I wanted to feature the flower fabric with the little pink snail for the center of the block. Also, if you love applique, you might find something simple to applique in the center.

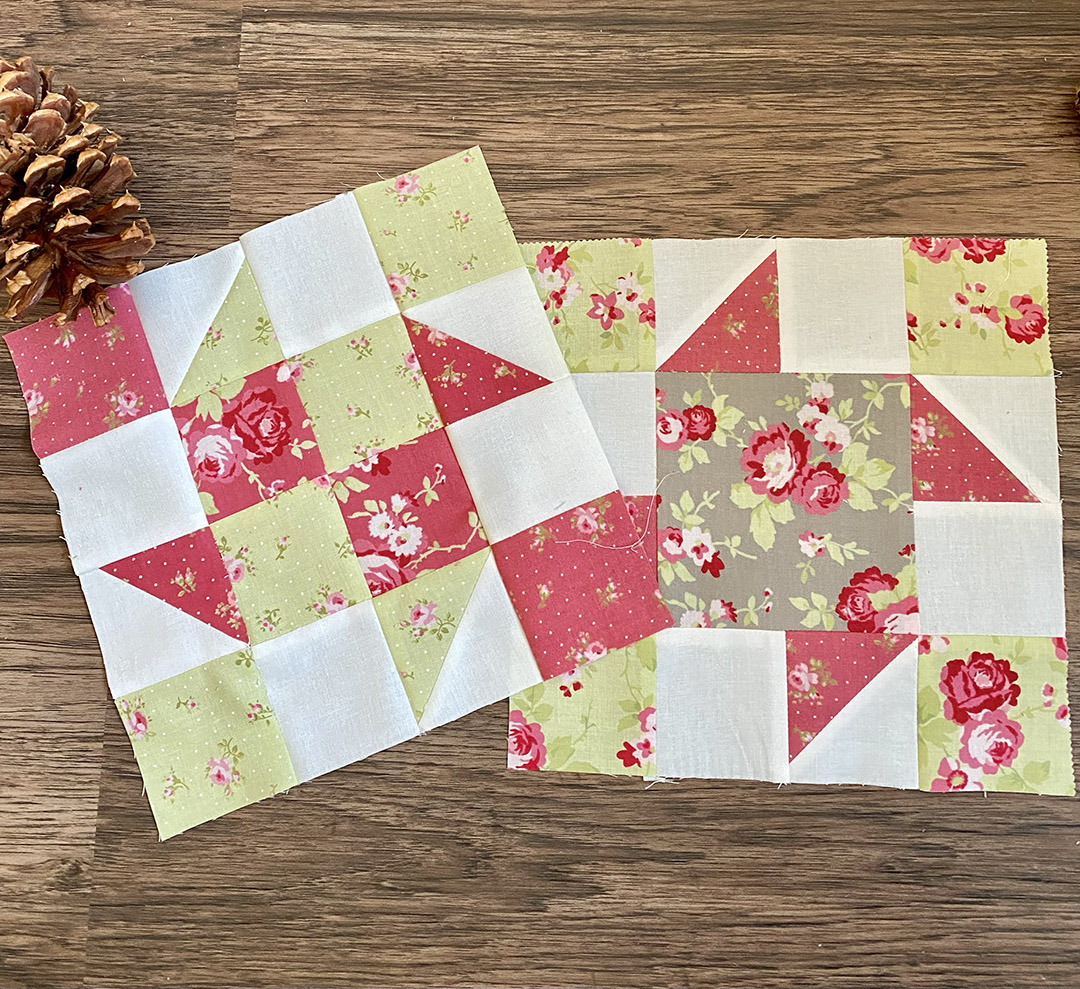
Or, you can make a four-patch center for this block, and when you discover you have a triangle going the wrong way, you can spin it around and re-stitch like I just did. I’m not sure which one of these blocks will end up in my final quilt. I’ll decide when I have a few more blocks finished.
I’ll share my digital quilt every month to show you how my layout is coming along. I’m using a design similar to one of Moda’s, but I’ve added sashing posts. I’ll decide on borders and final block placement as we get closer to the end. I’m only going to use 25 blocks, and I may do a few extras that can be used for something else when I finish. Here are blocks 1 through 4:

Many of you may know my assistant Sue, and she’s joining me in sewing along. It’s so fun to see Block 4 in a different fabric from mine. Sue selected Benda Riddle’s Sophie fabric line. Here are Sue’s versions of Block Four in Sophie! I love this fabric line, don’t you?
I’ll leave you with a couple of tips for beginners:
If you’re a beginner or don’t think of yourself as an accurate sewer, be sure and read through Moda’s Basic Information on Seam Allowance. Then, make the test strip to see how close you are. I sew on a Bernina with an accurate 1/4″ mark on the throat plate, but I also use the Diagonal Seam Tape as a 1/4″ guide. It works for sewing diagonal triangles, but it also has an accurate1/4″ seam allowance mark on each side of the center line.
You can find the Diagonal Seam Tape here:
Diagonal Seam Tape
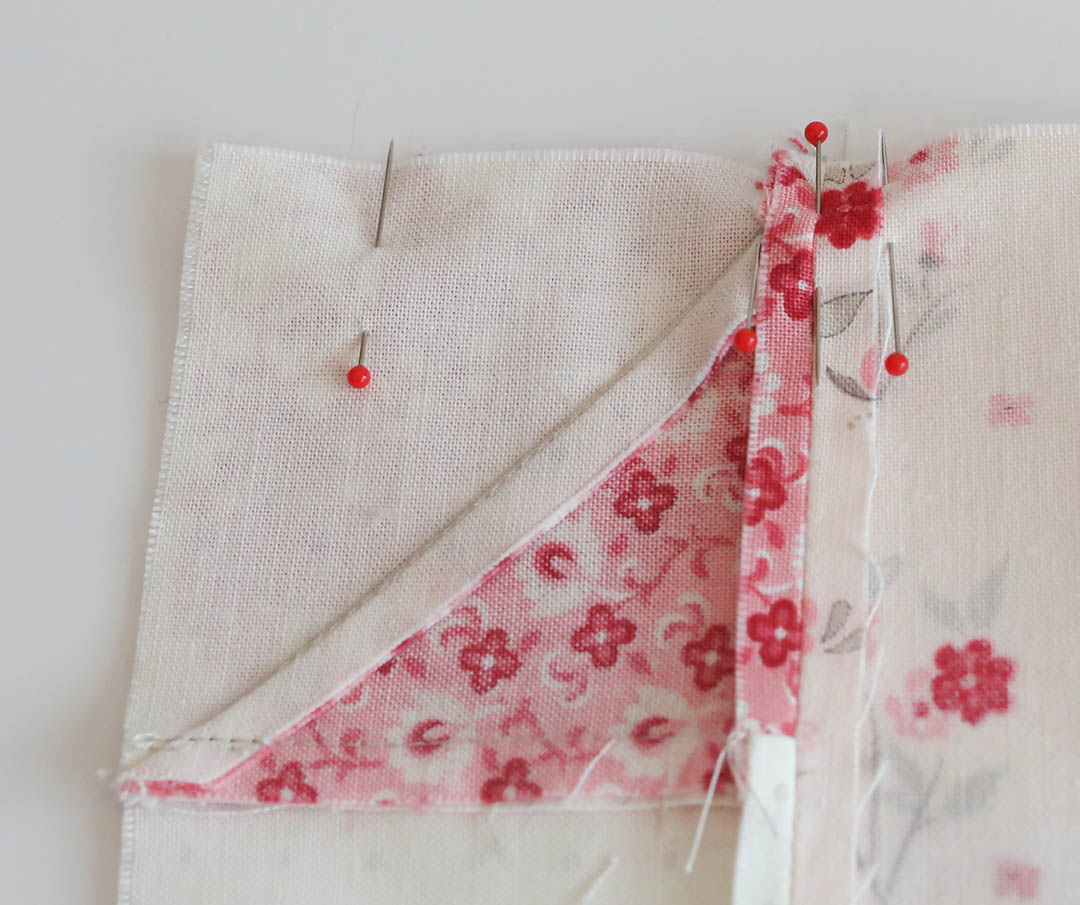
Here’s a tip for pining your seams. I learned to pin in clothing design school, and I’ve used this technique ever since. I use 3 pins for each seam intersection. I insert the first pin straight down into the two seams, then bring the pin to the top of the seam allowance. The other two pins are inserted in the opposite direction, next to the seams. I don’t remove the pins as I’m stitching. Instead, I sew right over them. The two outside pins help hold the fabric as your presser foot approaches the seam. You’ll have the perfect seam intersection if you’ve pinned the center pin correctly.
Have a great week, everyone! I can’t wait to see your blocks!
Anne
22 Comments
Barbara Peavler
Thank you for an adorable block! Love your new fabric line.
Patty Jones
Beautiful fabrics and beautiful blocks!!
Hildy
I love your block thanks so much for the pattern! But I think you have a hst turned the wrong way in your scrappy four patch center block;-)