Sunday Best – My Block for Moda Blockheads 6
Hi everyone! I’m excited to share my Moda Blockheads 6 quilt block, I’m calling Sunday Best! There’s something so special about Sundays, and this block reminds me of my favorite “Sunday best” traditions—a pretty dress, a fresh bouquet on the table, or a lovingly pieced quilt on the back of a church pew. It’s classic, sweet, and just a little bit nostalgic.

I made my blocks using my new fabric collection, A Very Sweet Christmas, which will ship to quilt shops this month! The yardage is expected to arrive within the next week or two, followed by the pre-cuts and kits a week later. We are eagerly awaiting the arrival of our Sweet Christmas Kit, and if you pre-ordered one from us, we’ll be shipping it to you very soon.
If you’re sewing along with Blockheads 6, this block is a cheerful addition to your sampler quilt! It gives you lots of room to play with color and contrast.
Sunday Best Piecing Tips
Here are a few of my tips for sewing the Sunday Best block:
1. Choose playful prints with contrast
This block is great for showcasing a mix of florals, stripes, and tiny tossed motifs. I used a bold print (penguins, of course) in the flying geese—it gives the block a little “gift wrapped” look that’s so festive, and I followed it up with a softer “shabby chic” look for my second block!

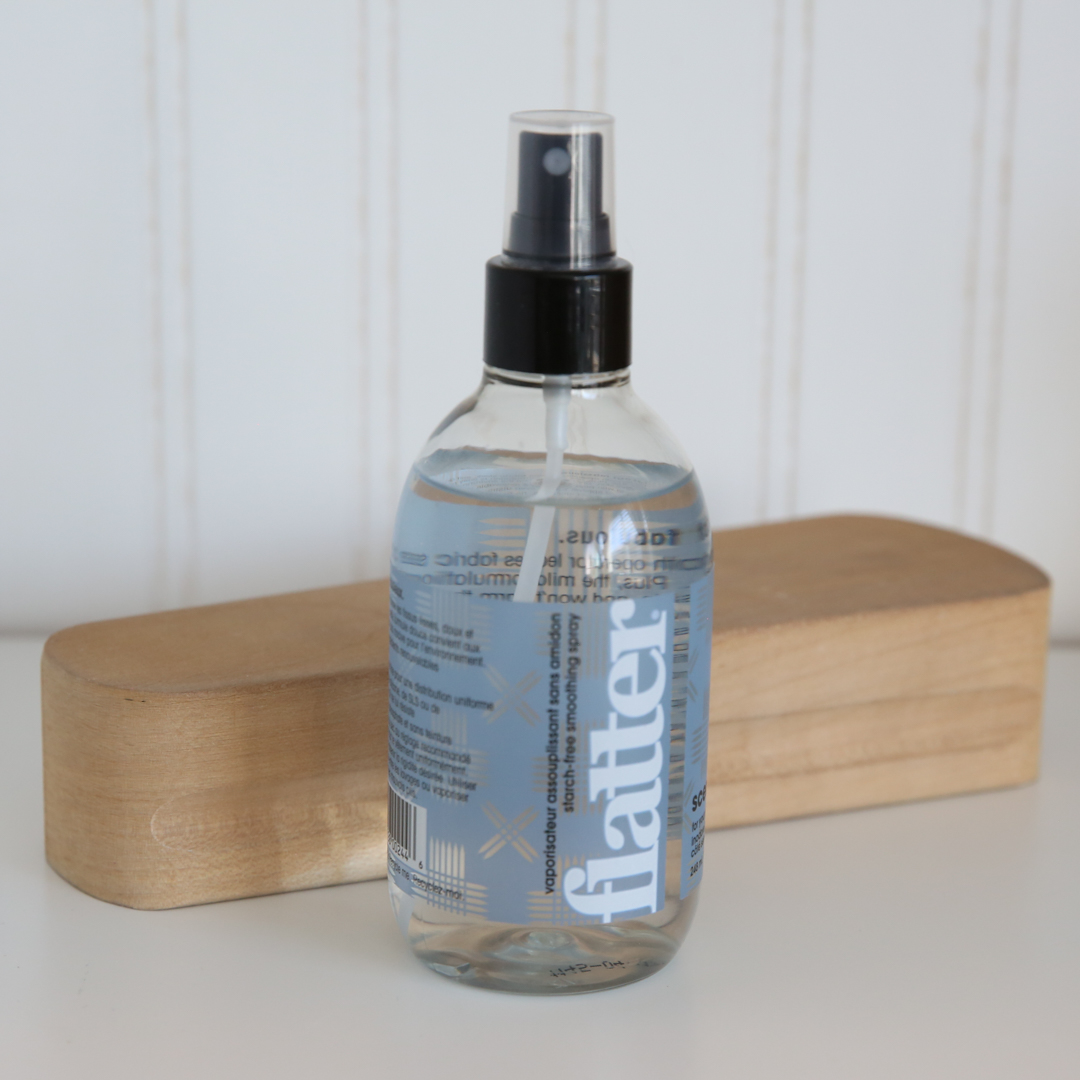
2. Press seams open for a flatter finish
For this block, I pressed all my seams open. It helps reduce bulk and keeps everything lying smoothly, especially when matching points. I used my trusty clapper and a spritz of Flatter spray to really set the seams crisp and flat. This is the first time I’ve used the Flatter spray, and I really like it! My friend Nancy, who also works for Bunny Hill, recommended it. I haven’t tried it for spray starch appliqué yet, but it’s on my list to try next.
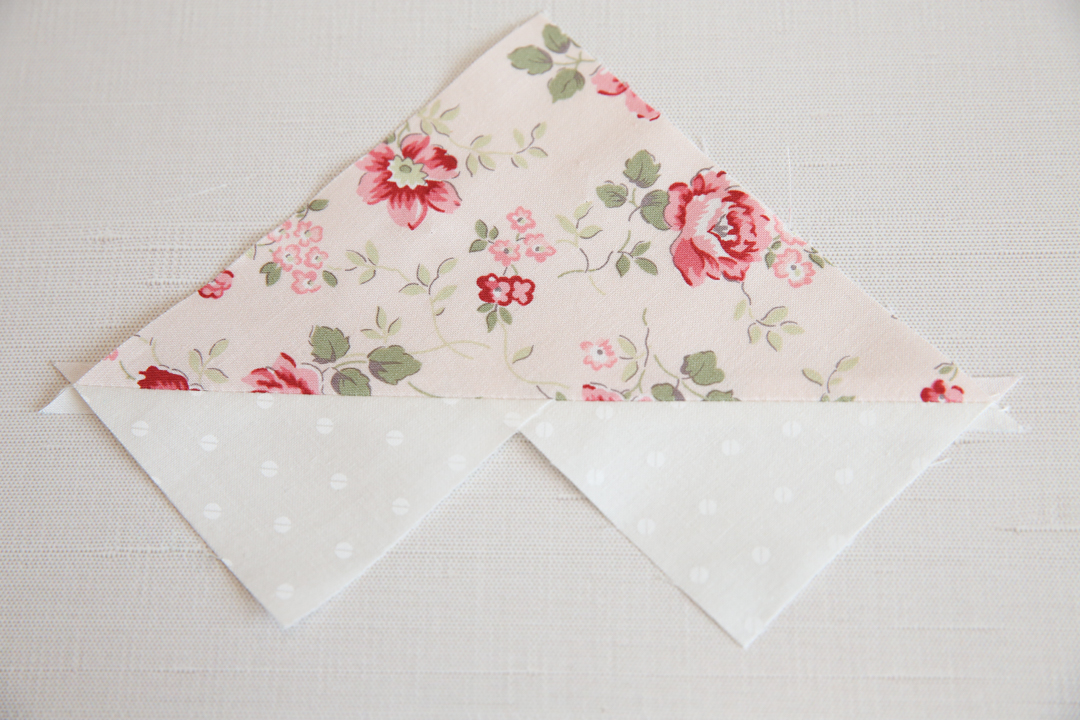
4. Lay out the block before sewing
Before joining the rows, lay out the whole block to double-check placement, especially with prints that have direction (hello, stripes!). It’s also a great time to step back and make sure the colors feel balanced.
5. Pin and sew carefully
Since seams are pressed open, pin directly through the seam lines to match them precisely. Take your time sewing rows together. Use a slightly shorter stitch length for stability.
6. Final press
Once your block is complete, give it a final press—again, I used Flatter and my clapper for this step. Take a moment to admire that crisp, sweet finish. It really does feel like your Sunday Best!
You can find the pattern and more information here on the Moda Blog!
I made some extra blocks so I could turn them into a table runner for Christmas morning! This was such an easy project! First, I added 2 1/2″ (cut size) sashing strips between the blocks. The inner border and outer border strips were also cut 2 1/2″ wide. You can use any of the 9″ blocks for this runner, so if you have extra leftover save them for a project like this one.

I can’t wait to see your version of Sunday Best! Be sure to share your block using #modablockheads and tag me too—I’d love to see how you bring this block to life in your own way.
Wishing you Sundays filled with stitches and smiles,
Anne


11 Comments
Debbie Ingram
I was so excited to see that this week’s block was from you! I knew I would love it before I even saw it. Thanks!
Mary T Salmon
Hi Anne!
I love your block and finished it today. Can you tell me why each pattern so far calls for two blocks? Thanks for your help! Love, Mary
kabquilting
If you are following the “moda is my favorite color” pattern you can see each block is used twice. Go to the Moda Block head 6 site and read all about it. :0)
Sherly
Your fabric & block is fantastic !