Where do I start?
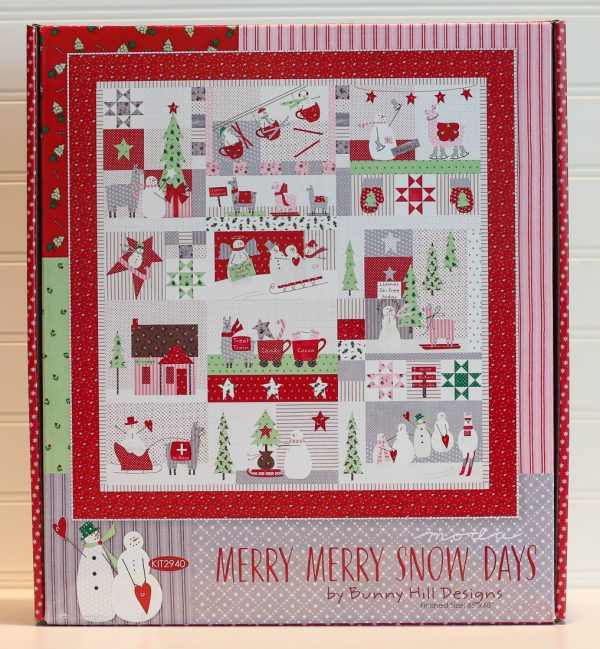
If you’re making the Merry Merry Snow Days quilt, and you’ve purchased a kit, you should have it very soon. We’re shipping our pre-orders this week and some quilt shops already have them in stock. Either way, you have plenty of time to get going on this quilt. so don’t worry.
Let’s open the box!
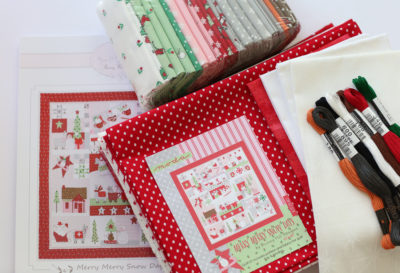
So you finally have the Merry Merry Snow Days kit in your hands! You open up your kit and now what do you do? Can you really cut into all that fabric?
You can! I’m going to come over and stand next to you. Or, at least I’ll be close by. Let’s take a look inside this beautiful kit.
Ziplock bags?
First, grab 11 large Ziplock bags and using a felt tip marker, label one bag “Borders & Binding”. Number the rest of the bags block one through block 10. (I do this every time we start a block of the month quilt. Every block gets its own bag.)
Check the fabric before you cut
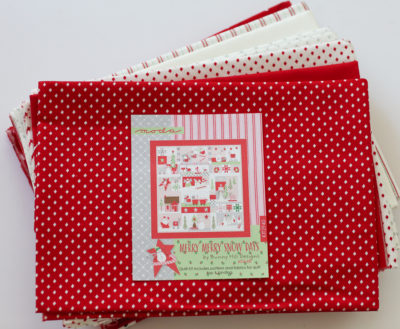
Now remove the pattern and the large bundle of fabric below. Most of the fabrics in this kit are used for both applique and backgrounds or borders, so they need to be cut carefully. The last thing you want to do is start cutting into the fabric for applique that might be needed for a large background or border later on.
We’re working from the outside in!
Turn to page 5 in the pattern. This is one of those pages you NEED to read if you’re working with a kit! Let’s start with the outer border fabric and cut it first. Since the fabric is directional we’ve figured the cutting for you. Cut this fabric following the directions on page 5 and you’ll have the perfect borders. Here’s a tip: cut the lengthwise borders 1″ longer than necessary, in case you need to adjust them at the finish. Instead of two LENGTHWISE cuts of 60 1/2″ cut 61 1/2″.
Label the pieces you just cut for the borders with a post-it or scotch tape. Nancy, who does a lot of cutting for me, uses a permanent marker and writes what each piece is on scotch tape. She sticks it on the cut fabric and we always know what it is and where it belongs. Once you’ve labeled these border cuts, (top, bottom, sides) put them in the border bag. Now breathe a sigh of relief because that piece of fabric you have left over can be set aside and used as you need it!
Now it’s on to the inner border and binding fabric!

Following the cutting directions on page 5, cut your inner border strips, put into a smaller Ziplock bag, label and keep in the larger border bag until you need them. Do the same for the binding strips. Any of the leftover stripe can be used for the applique and small backgrounds!
Skinny llama legs?
Now let’s talk about Llama legs! These are easy, and we’re going to make them all at once! Or, I should say, we’re going to make all the taupe legs at once. While we’re at it, we’ll be making some tree trunks and signposts too!
Now let’s cut open that smaller bundle with all the fat quarters and fat eighths. Take out the brown fabric with all the stars.
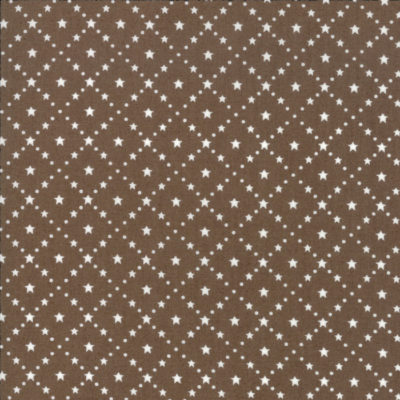
Grab that ¼” bias maker. If you’ve never used one before, follow the directions on my 2009 blog post (link below). Fold the fat quarter into a triangle, wrong sides together (yes, you’ll have a little 4” piece sticking out at the end). Press the fold, and you’re ready to cut! You’ll be cutting ½” wide strips. I cut a bunch of strips and then use my bias maker. Make enough ¼” bias for approximately 63”. It sounds like a lot of bias, but you’ll be so glad you did it this way! Every time you come to a llama leg, you snip off what you need and stitch away!
https://bunnyhillblog.com/2009/03/04/bias-maker-heaven/
This should get you started. Next up I’ll be talking about stars, snowmen noses and then we’re onto block one. I’ll be doing a post for this quilt every 3 weeks and if you keep up you’ll have it completed by Christmas. Happy stitching!
Anne
4 Comments
mimisdarlins
Great idea to do this ‘starting’ post for those making this darling quilt. Sometimes opening a kit for the first time can be a bit overwhelming.
Mary salmon
Anne: I wish all patterns were detail like this!
Love,
Mary
DeAnna Dodson
Such a CUTE pattern, and I love, love this fabric! And I vote a definite yes for bias makers. I do a lot of vines and stems (no llama legs . . . yet!), and the bias makers are the way to go! :D